ブログ|オフィス回復ドットコム

オフィシャルブログ

Underlay (base treatment) construction method │On office OA(=office automation) floor/ flooring 

Hello, everyone! We here are Office recovery and restoration Dot.Com. website.

Our company has an office at Ikebukuro, Toshima ward, Tokyo, and we are an interior decorative construction contractor, mainly taking charge of Interior decorative finishing construction・Original state recovery and restoration construction in all over Kanto district for you.


On this website blog, we are explaining various themes at the office and sharing construction site examples. In order to let this blog readers to enjoy reading them, we are thinking of supplying easy to understand and useful information to those who would like to request interior decorative construction in the future.

Kindly take counsel with us on any office interior decorative construction.


The content which we are explaining here is, on office OA floor/flooring construction partly.


This time,


It is on
「underlay (base treatment) construction method」

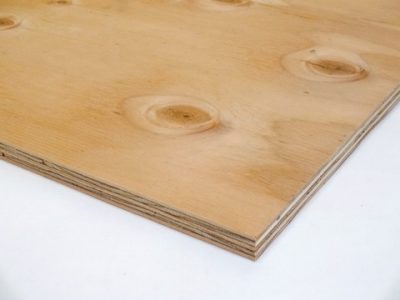
Quoted from FUKUBI Chemical Industry Co.,Ltd., website underlay ※pictorial image link


For OA floor/flooring, base treatment is one of the important operation work processes.


  1. Before laying OA floor/flooring, laying underlay is popular.

Underlay is, a material spreading under the floor.
Its roles are preventing hurt and sound on the floor, and enhancing the floor durability.


  1. By constructing underlay under vinyl chloride tile, carpet, long sheet,
    it becomes a floor base material sheet to absorb overturned impact to reduce hurting risk.

Because it is active as a floor/flooring material for various facilities,
it can be also used not only for office OA floor, but also for elderly dwelling and facility, educational facility, and so on.


We are explaining underlay construction method as follows:


  1. Base treatment on the floor surface

Before spreading underlay, it is necessary to treat floor surface base.

Confirming that the floor surfacer is flat, and without dirt or hindrance.

Please also confirm that it is dry well, and get rid of dust and obstacle.

If required, spread materials such as gravel, sand and so on, then set it flat.


  1. Spreading underlay

Spreading underlay on the floor surface.

The methods of spreading the underlay are, full spreading, half spreading ad so on.

Full spreading is, the method of spreading underlay on all over.

Half spreading is, the method of spreading underlay all over at a few centi-meter inside from the edge.

Full spreading method can be maintained evenly all over the floor, but by using a lot of material. While, as for half spreading, material used quantity can be smaller. However, as a demerit, underlay is easy to be shifted.


  1. Sticking underlay

After finish spreading underlay, if required, fixing it by using adhesive.

When using adhesive, according to the construction method, coating it evenly on the floor, and thrusting the underlay from above. After the construction, please let off air with stripping-off rod. After the adhesive is dried, it is possible to lay OA floor/flooring.


※Point to be noted when executing finishing material

After executing FUKUBI underlay construction, please cure it for equal to or over than 24 hours firstly, then execute finishing material construction.

Please avoid laying floor finishing material and FUKUBI underlay joint together.

When cutting cushion floor and vinyl floor sheet together, please do not cut them overlapped with FUKUBI underlay.

Besides, please execute construction by following the construction method of each finishing material.


Summary

The construction methods of underlay are sometimes different according to floor types and construction contractors.

The important point is, the construction contractor has the suitable skill, and execute the precise construction.

In addition, before executing construction, it is necessary to fully check the important points such as laying the plan, treating the base, and so on.

That is all for our explanation of the construction method of underlay.


Finally,

On office interior decorative construction, please take counsel with us light heartedly.


~~~~~~~~~~~~~~~~~~~~~~~~~~~~~~~~~~~~~~~~

On office building・tenant(shop or store) original state recovery and restoration cnstruction・renovation decorative construction・recovery and restoration construction, moving in construction, relocation, removing, reform construction and so on, if you are considering to request, please be sure to contact us light heartedly.


Instagram     Twitter     Facebook   


It is also possible to give us your inquiry from SNS social media.
Please be sure to see it together.


From price quotation to construction work completion, our company directly manage and do all of construction work by ourselves.

So, we are supplying
「reasonable construction work as much as possible with high quality and better service」
to our customers.


◆If you look for interior decorative construction・original state recovery and
restoration construction at Ikebukuro, Toshima ward, please contact
Office recovery and restoration Dot.Com.◆

Address: 〒171-0014

4th floor, Musashiya No.3 Building

62-10, 2-chome, Ikebukuro, Toshima ward, Tokyo

GLボンドを使った石膏ボードの貼り付け:耐久性と効率性を兼ね備えた内装工事

こんにちは、オフィス回復ドットコムです。

東京都豊島区池袋にオフィスを構え、関東一円範囲で内装仕上げ工事・原状回復工事を中心に施工している内装業者でございます。

このブログでは、オフィスの様々なテーマについて解説したり、施工事例をシェアしたりしています。
読者の皆様が楽しんでいただけるよう、わかりやすく、そして今後内装工事について考えてる
皆様に役に立つ情報を提供していきたいと思っています。

オフィスの内装工事のことなら何でもご相談ください

ご紹介させていただく内容は、「GL工法」の一部についてご紹介します。


GLボンドを使った石膏ボードの貼り付けについて


今回は施工事例や施工の様子ではなく、実際の施工方法についてご紹介したいと思います。

タイガーGLボンド:吉野石膏様より引用

タイガーGLボンド:吉野石膏様より引用

内装工事において、石膏ボードは広く使われる素材の一つです。
その中でも、GLボンドは優れた接着力と耐久性を持ち、石膏ボードの貼り付けに効果的です。
GLボンドを使った石膏ボードの貼り付けは、効率的で均一な仕上がりを実現するだけでなく、耐久性も向上させることができます。
この記事では、GLボンドを使った石膏ボードの貼り付け手法とその利点について詳しく紹介します。


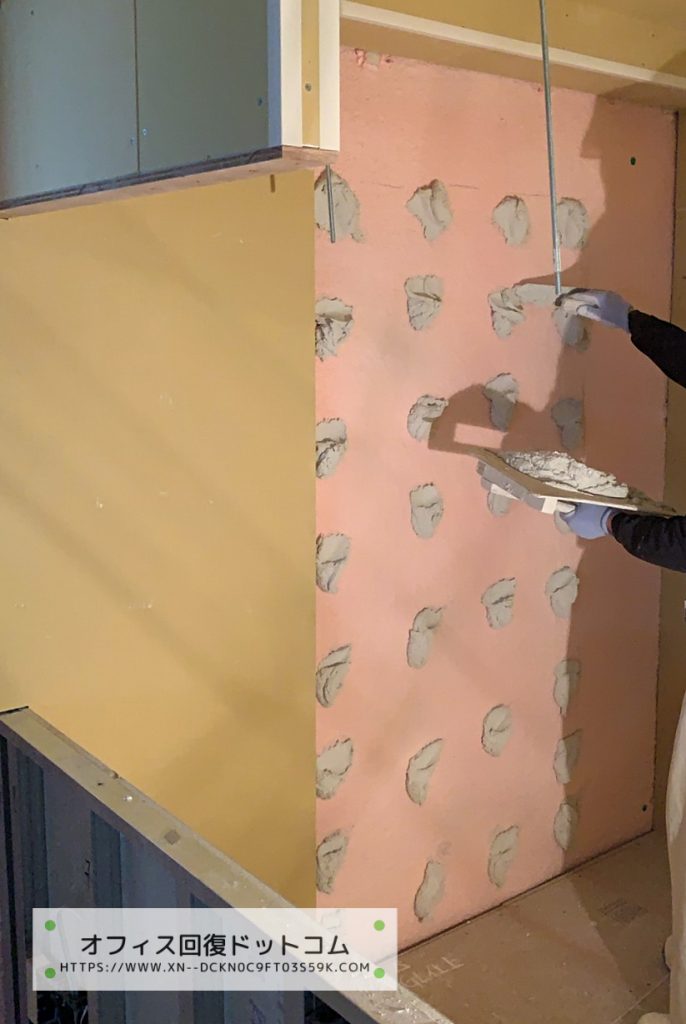
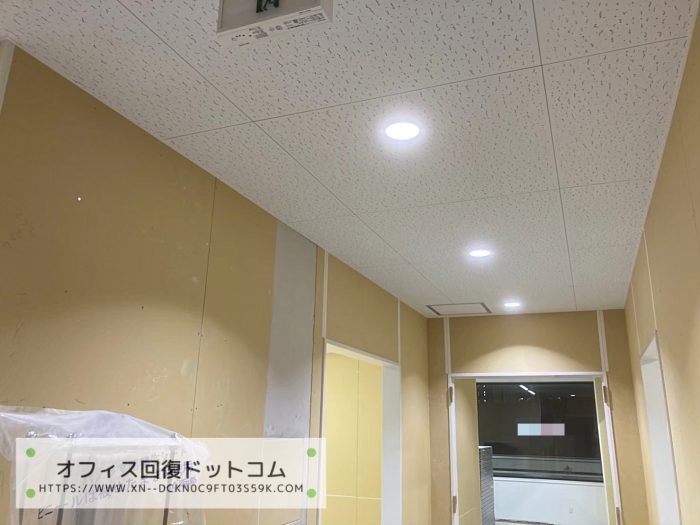
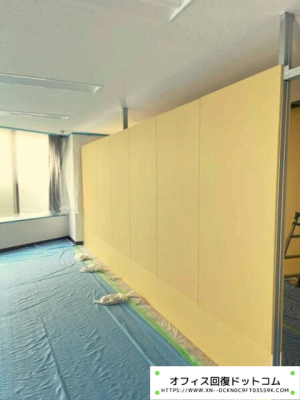
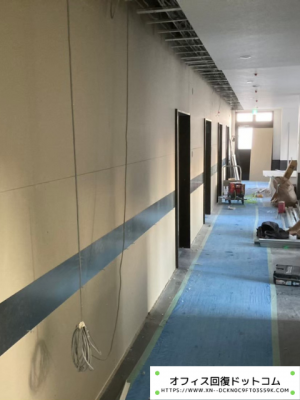
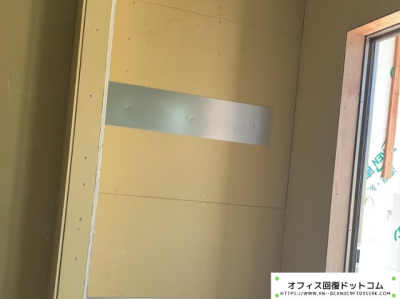
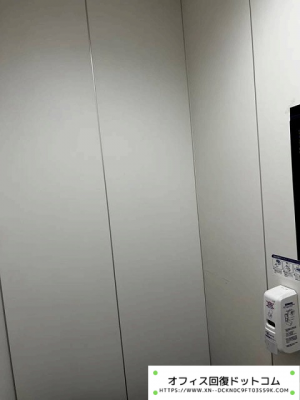
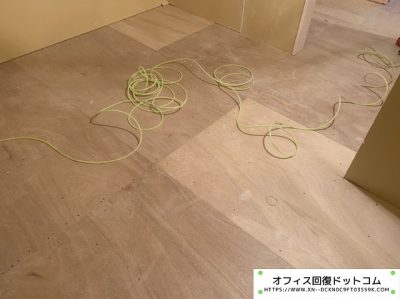
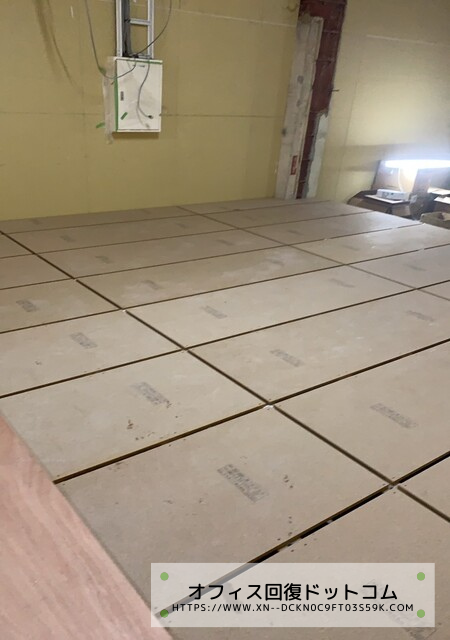
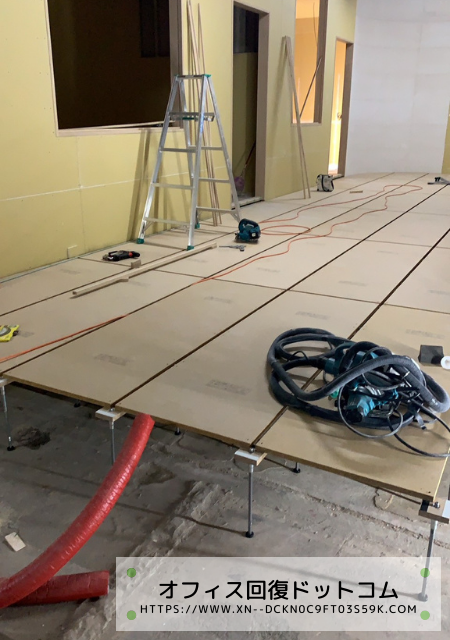
GLボンドを使った施工の写真がこちら

GLボンドを使った施工の写真がこちら


GLボンドとは何か?

GLボンドの特性と用途について説明します。

GLボンドは木材や合板、石膏ボードなどの素材を接着する際に使用される接着剤です。強力な接着力と耐久性を持ち、石膏ボードの貼り付けに適しています。


 GLボンドを使った石膏ボードの貼り付け手法

1.下地の準備
壁面を清掃し、平坦な状態に整えます。必要に応じて下地処理を行います。

2.GLボンドの塗布
石膏ボードの裏面に均一にGLボンドを塗布します。
適量のGLボンドを使い、ムラのない塗布を心掛けましょう。

3.石膏ボード貼り付け
塗布したGLボンドの面と壁面を密着させ、石膏ボードを貼り付けます。
適切な圧力をかけ、均一な接着を確保します。

4.乾燥と仕上げ処理
貼り付け後、GLボンドが完全に乾燥するまで待ちます。
その後、ジョイント処理や表面の仕上げを行います


※ジョイント処理とは(目地処理工法)

ジョイント処理は、石膏ボードの貼り付けにおいて、石膏ボードの接合部分やひび割れ、へこみなどの処理を行う工程です。
石膏ボードは一枚の大きな板ではなく、必要な寸法に合わせて複数の板を貼り合わせることで壁面や天井を形成します。
その接合部分や隙間を埋め、均一で美しい仕上がりを実現するために、ジョイント処理が行われます。

ジョイント処理は、GL工法において石膏ボードの接合部をきれいに仕上げる重要な工程です。
以下に一般的なジョイント処理の手順をご説明します。


1.ジョイントテープの貼り付け
石膏ボードの接合部にジョイントテープを貼り付けます。
ジョイントテープは、クラック(ひび割れ)を防止し、接合部を強化する役割を果たします。
接合部全体にテープを均等に貼るようにしましょう。
テープを貼る際には、接合部をしっかりと押さえながら作業することが重要です。


2.ジョイントコンパウンド(ボンド)の塗布
ジョイントテープが貼り付けられたら、ジョイントコンパウンド(ボンド)を使用してテープを埋めます。ジョイントコンパウンドは、石膏ボードの表面をなめらかに整え、接合部を一体化させる役割を果たします。広い刷毛やスポンジを使い、均等にコンパウンドを塗り広げましょう。


3.コンパウンドの乾燥
ジョイントコンパウンドが十分に乾燥するまで待ちます。
乾燥時間は製品の指示に従って確認しましょう。
乾燥時間が短い場合は、加熱や乾燥機を使用することで早めることもできます。


4.サンディング(研磨)
乾燥したジョイントコンパウンドをなめらかに仕上げるために、サンドペーパーやサンドスポンジを使用して研磨します。
不要な凹凸やザラつきを取り除き、接合部を均一な状態に整えます。
サンディング後は、掃除機や布で壁面を清掃しましょう。

以上が、一般的なジョイント処理の手順です。

ただし、具体的な手順や材料の使用方法は、現場の状況や施工条件によって異なる場合があります。プロの内装業者に相談し、適切なジョイント処理を行うことをおすすめします。


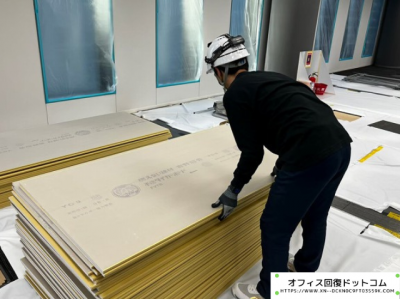
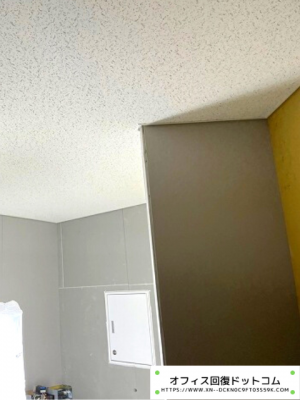
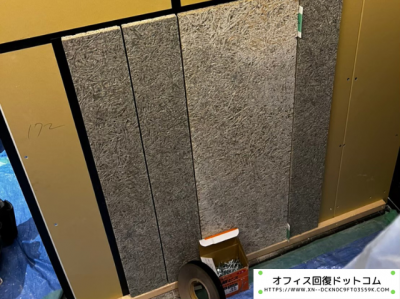
石膏ボードを貼り付ける写真


GLボンドを使った石膏ボード貼り付けの利点

・強固な接着力
GLボンドは優れた接着力を持ち、石膏ボードを壁面にしっかりと固定します。

・耐久性の向上
GLボンドによる接着は耐久性に優れており、長期間にわたって石膏ボードの剥離や浮き上がりを防ぎます。

・効率的な施工
GLボンドを使用することで、石膏ボードの貼り付け作業が迅速かつスムーズに行えます。


注意事項とプロのアドバイス

・適切な下地処理が重要です。壁面の清掃や平坦化を丁寧に行いましょう。

・GLボンドの適切な塗布量と均一な塗布が必要です。指示に従って作業を行い、ムラのない貼り付けを心がけましょう。

・必要に応じて専門家の助言や指導を受けることをおすすめします。


まとめ

GLボンドを使った石膏ボードの貼り付けは、内装工事において効率性と耐久性を追求する上で重要な手法です。

強力な接着力と耐久性により、石膏ボードの剥離や浮き上がりを防ぎ、長期間にわたって美しい仕上がりを保ちます。

正しい手法と適切な施工を行いながら、GLボンドを使った石膏ボードの貼り付けを行いましょう。その結果、耐久性に優れた内装仕上がりを実現できるでしょう。


ご依頼・お問い合わせはこちらから

内装仕上げ工事にご興味やご依頼がありましたら、お気軽にお問い合わせください。
お客様のご要望やご予算に合わせた最適なプランニングと施工をご提案させていただきます。


GL工法を使用した原状回復工事の施工事例はこちら

原状回復工事(1)


~~~~~~~~~~~~~~~~~~~~~~~~~~~~~~~~~~~~~~~~

オフィスビル・テナント(店舗)の原状回復工事、入居工事、移転、撤退、リフォーム工事など

検討中でしたら是非、弊社へお気軽にご連絡下さい。


Instagram     Twitter     Facebook   

SNSからもお問い合わせできます。是非、ご一緒にご覧ください。


当社は、お見積もりから施工完了まで全てを自社で行い

お客様に「少しでも価格を安く、品質が高くて良いもの」の

提供を目指してお手伝いさせていただきます。


◆豊島区池袋の内装工事・原状回復工事ならオフィス回復ドットコムまで◆

〒171-0014

東京都豊島区池袋2-62-10 武藏屋第3ビル4階

TEL:0120-978-226

关于高空作业平台 至于室内装饰施工的高空作业 

大家好! 我们里是公室修复原状Dot.Com.网站

我们公司以池袋为中心,在关东全部地域范围内,正在从事施工「室内装饰最后施工」
「修复原状施工」为主,为客户服务。


脚凳、脚手架平台、移动式室内立足之地等,室内装饰施工时使用的立足之地有很多种类。

此次,我们将要说明一下平时不太看到的?自走式高空作业车辆。
总之,室内装饰施工的话,很少在较高的天棚施工。
因此,前述的脚凳、脚手架平台、移动式室内立足之地等的话,几乎所有场合足够用。
不过,在工厂等的场合,有些天棚比较高,所以,在现场有机会要用高空作业车辆或者高空作业平台。


此次,我们跟那样的现场照片一起想要说明一下。


首先,关于高空作业车辆的定义,指的是,
一种自走式的机械即持有把工作台可以上升2米以上的能力,
和由升降装置、行走装置等使用动力,而自己可以走动。

关于这种车辆的驾驶执照,高空作业车辆之中,可以上升2米以上到10米的话,
需要特别教育合格证,可以上升超过10米的话,需要技能讲习的合格证。

特别教育,上一天的课程就可以拿合格证。不过,技能讲习的场合,
如果一部分的讲习没必要上课,大概,最短也需要上两天的课程。


不过,请小心!
有高空作业车辆特别教育驾驶证的人们,却不一定可以当做作业责任。

如果还有其他复数人员一起做工,有资格当作作业作业责任的话,
只合格特别教育的人也可以的。

不过,如果没有可以当作作业责任,或者只有1到两个的话,
那么,请考虑一下 上技能讲习的课程也许好吧。

跟高空作业车辆不同,操作高空作业平台的作业并不需要任何资格。


高空作业车辆,客车型的场合,也可以开公路。
不过,按照该车辆的载重量和车辆总重量,都有合适的驾驶执照。
因此,开公路的场合,有时候需要事先拿到准中型驾驶执照或者中型驾驶执照。


室内装饰业界的话,使用脚手架平台或者室内作业用的立足之地,
大概几乎所有场合都足够用。

不过,比较像 高工作业平台的用语,我们此次也稍微谈到高空作业车辆了。
为了两种的都安全地使用,以正确地使用是最要紧的吧
(高空作业车辆的场合,也要拿到资格)。


-=-=-=-=-=-=-=-=-=-=-=-=-=-=-=-=-=-=-=-=-=-=-=-=-=-=-=-=-=-=-=-=-=-=-=-=-

当然包括天棚或壁的修补施工、涂装工事、店铺的新开业和更新之事,
请务必到 修复原状Dot.Com.乐意来商谈!

我们也等待着各位「Instagram、推特、Facebook」的跟随。

Instagram     Twitter     Facebook   


从报价到施工完毕,我们公司全部都是亲自安排施工工事,
我们正在给客户供应「尽可能便宜的、质量高的好产品」。

「应该依赖哪一家施工业界单位好?」「施工费用大概需要多少钱?」等,
也除了上记以外,我们正在等待各位提来的有关问题。

办公室・店铺・仓库的搬迁、修复原状施工、整建整修施工(室内装饰施工)等,
首先请乐意给我们有关查询!


~~~~~~~~~~~~~~~~~~~池袋~~~~~~~~~~~~~~~~~~~~

如果各位想找池袋的室内装饰施工单位,就是 办公室修复原状Dot. Com.

如果各位也想找东京的修复原状施工,就是 办公室修复原状Dot. Com.

邮编:〒171-0014

地址:东京都丰岛区池袋2-62-10 武藏屋第三楼四层

免费电话: 0120-978-226

~~~~~~~~~~~~~~室内装饰施工业界单位~~~~~~~~~~~~~~~~